If you are 3D printing multiple parts using SLS nylon material, you need to know about nesting. This technique will save you money and make you feel like an expert in 3D printing.
If your design has a lot of parts, you can most likely use nesting to lower the overall cost of printing. In some cases, you can print all of your parts for the price of the largest one.
In this article, we will teach you everything you need to know about nesting 3D models for the best possible results. The following topics will be covered:
What is nesting?
When is it possible to nest 3D models?
Nesting - guidelines and rules
How to nest 3D models properly
How much money can you save with nesting?
We will also provide you with references to free nesting software, as well as premium applications. Let’s get started.
What is nesting? | Nesting Definition
In the context of 3D printing, nesting (aka packing) describes the process of grouping two or more objects in order to minimise their combined bounding box volume. A perfect example of this is found in Russian dolls. They nest inside one another allowing for multiple dolls to fit within the bounding box of the largest doll.
Nesting is a way to use 3D printing space more effectively when printing with Powder Bed Fusion technologies such as SLS 3D printing.If you are only printing a single part, nesting will not be relevant to you. Get an instant quote for your part here or read on for future know-how.
Why is 3D nesting important?
Nesting allows for your parts to be manufactured more economically. The reason for this is very simple and is down to the way in which SLS 3D printers function. An SLS machine can print a rectangular bucket load of parts simultaneously. Each bucket load costs the same amount to print regardless of how many parts are inside. Therefore, the more parts that can be squeezed into a single bucket, the better the value of the build.
When calculating the cost of an SLS 3D printing order, our pricing algorithm considers the XYZ dimensions of the part to calculate the bounding box volume. This determines the amount of space that the part will use up inside of the SLS machine. While there are some other factors that can affect the pricing, this is by far the most important. Grouping your parts together to minimize the overall bounding box will result in cheaper SLS prints.
When is it possible to nest 3D models?
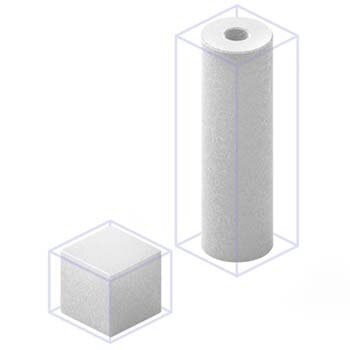
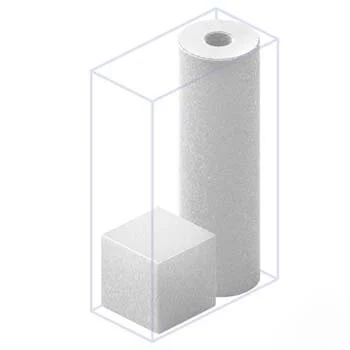
Both of these are the same price
As they take up the same amount of space in the XYZ dimensions, these orders are the same price on our online quoting system.
Nesting is only possible when using powder bed 3D printing technologies, such as SLS. Multiple parts are required for nesting as savings will only be made when the parts can be grouped together. While there are no specific parameters that make a single part suitable for nesting, some of the most common indicators are:
Overhangs
Gaps
Curves
Acute angles
Draft angles
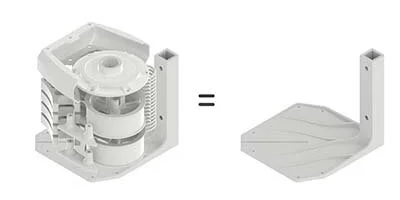
Complicated 3D assemblies with multiple parts usually nest efficiently as the amount of empty, unused space (that you are already paying for) raises with the complexity of any given 3D model.
Multiple units of the same part can also nest extremely effectively, particularly if they are designed with this in mind.
NESTING - GUIDELINES AND RULES
Rule 1. Mind the Gap
In order to avoid fusing your parts together in the printing process, a 1.5mm gap is required between all of the components in your 3D file. Anything less than this increases the risk of your parts being fused together. At 3D People, we check every file and try to spot these issues before printing. However, it is always advised that you double check your file before placing your order.
Rule 2. Interlocking Parts
Another issue we commonly see is the accidental creation of a chain made from objects that shouldn’t be interlocked. The parts are nested and the clearance is wide enough, but the parts interlock making it impossible to remove them from one another, just like a chain.
Of course, if you are printing a chain (which is completely possible with SLS), this is exactly what you want.
Rule 3. Trapped Parts
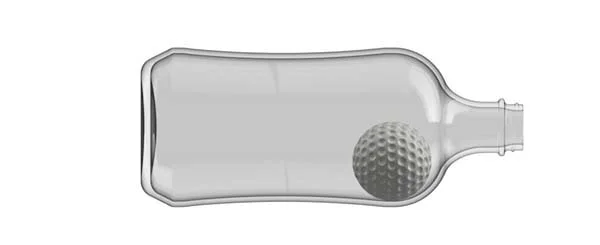
Similar to interlocking, this issue arises when one part becomes trapped inside another. For example, if a ball is printed inside of a bottle where the bottleneck is narrower than the diameter of the ball, it will become stuck.
Rule 4. Nesting won’t save you money every time
Nesting will only save you money if the bounding box volume of your nest is less than the sum of the bounding boxes of the individual parts.
As mentioned previously, there are no specific parameters that make a single part suitable for nesting. It is the relationship between two or more files that is important when determining if it is possible to make an economical nest.
The total volume of the separate parts are smaller
The total volume of the grouped parts is larger
3D Printer Size
3D printers come in a variety of shapes and sizes. It’s very important that your nested 3D models can actually fit in the printer. Purchasing an SLS 3D printer is rather expensive, so you are most likely going to use a 3D printing service, like 3D People UK.
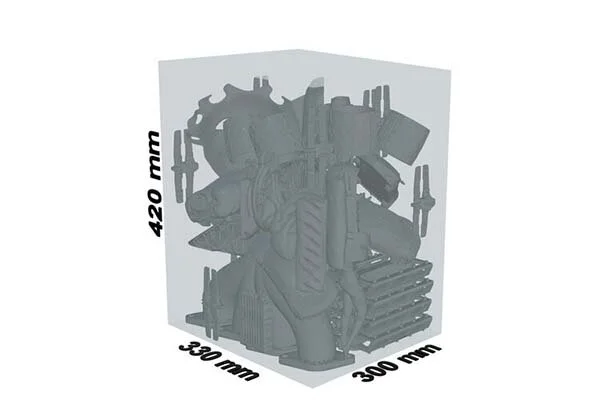
Our SLS printer is the 3DSystems ProX 6100 3D printer. As long as your 3D nest is smaller than 300x330x420mm, you can print it with our current equipment. If your nest exceeds this volume then we recommend making multiple nests or get in touch for a manual quotation.
How to nest your parts
In order to nest your parts, you will need to use a 3D software to group and manipulate the arrangement of the 3D files. This can be done manually with a wide range of free and paid software. While there are some programs available for automated nesting, these are usually premium features reserved for operators of industrial 3D printers.
If you have designed the models yourself, then it’s probably easiest to nest your parts using the software you initially created the printing files with.
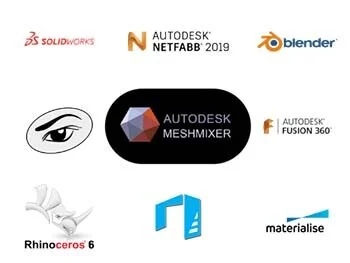
Below are some suitable tools for manual nesting:
Open the parts in your chosen software and arrange them so that you can view them all at once. Your goal is to fit the parts together like a 3D puzzle, so look out for any parts that appear a good match. Try a few different combinations and think about how you can arrange them to minimize the space. It is usually best to start with the largest model and move the smaller parts to nest around it.
Once you’re finished, export your group of nested parts as a single file and check the price with our instant quote algorithm.
Automatic Nesting Tools
There are some tools that are using iterative programming to do the nesting job for you.
Whilst this can save you time, it is usually less efficient than manual nesting. These programs are typically used for nesting high volumes of parts and come at a significant premium price. We don’t recommend them unless you consistently require high volumes of parts.
Here’s a list of all of the automated nesting programs that we recommend:
How much money can you save with nesting?
As some parts can fit inside of each multiple times, the maximum possible savings are astounding. However, this is only possible for very specific geometries. For a typical order, most nested models provide about 30% in savings. If the parts have been designed with nesting in mind, the savings are usually upwards of 60%.
Conclusion
Nesting is a great way to save money when you are printing multi-part files with SLS 3D printers. While not all multi-part files can be optimized with nesting, many can.
Nesting is only available for printers that use Powder Bed Fusion technology, such as SLS. While there are other variants starting to appear, SLS 3D printing is the most popular and dominant form of 3D printing.
If you follow the guidelines and rules, you will have a very successful 3D printing session and save money in the process. Overall, nesting is a rather simple concept that is easy to understand and when implemented correctly, it can provide you with tremendous rewards.
Please feel free to reach out to us at print@3dpeople.uk with any enquiries.


